Tuesday, December 15, 2009

Don't Give Up On Us!


With the holidays here, the Four Chicks have been a little busy.  We're cooking of course, but we just haven't had time to blog it.  So keep checking back.  We'll get our butts in gear soon and get back to what we came here for...
To see what Four Chicks, scattered across America, who are NOT Martha, can come up with when we throw a few things in a bowl! 

Until then, Happy Holidays and Merry Christmas to our readers!

Monday, November 30, 2009

Pie in the Sky (week)!

Week of Thanksgiving...can you say CRAZYNESS in the extreme? Each of the Four Chicks made a pie but all forgot to take pics till the very end. So, we say take a look at your own dern pies and pretend we baked them for you. Okay?

Up next week: Ummm..check the schedule on the right.

Toodles,
XOXO

Tuesday, November 24, 2009

Oh Meatloaf How I Love/Hate You So....

Meatloaf is a sore subject for me. When I very first got married to my wonderful husband I had such high hopes. I grew up with a Grandmother & Aunt were were fantastic cooks, great at down home style from scratch cooking who never seemed to need a recipe to create beautiful & delicious meals, a mom who, while extrodinarily culinarily challenged (adding extra cheese to her kraft mac was about as adventerous in cooking as she got) dabbled in vegitarianism and introduced me (via wonderful local restaurants) to such delights as: tofu & bean sprouts, and a wonderfully endulgant dad who was willing to try whatever concoction I dreamed up, and praised each dish as a culinary masterpiece... looking back I'm sure he exagerated... but only a bit! So when I got married I was just sure that while my husband was accustomed to white bread, meat & potatos I would quite soon open his eyes to the wonderful world of creative cooking. I mean with my background & the obvious hereditary cooking skills where could I go wrong?

Well for starters I could go wrong with meatloaf. Shortly after my dear husband and I moved in together I announced that I was going to make him a delicious meatloaf dinner. Being a meat & potatos man, he was understandably excited as meatloaf is a far cry from the fish, veggie burgers & chicken dishes that he was beginning to fear were the only things I could (or would) make. Now I have never made meatloaf before but it can't be that challenging, everyone has a family specialty and I had never tasted one that was actually awful... maybe dry & bland but certainly they were always edible. I called around for tips and finally settled on my sister's Meatloaf Florantine. I subbed out a few things to make it easier & uber healthy and ended up with a turkey meatloaf with spinach mixed in and topped with a mix of italian cheeses. I was pretty proud of it, it was healthy, fairly tasty and while not traditional, it was technically a loaf of meat... I did not consider for a second that my husband might take offense to me messing with one of his favorite meals. He was not impressed and 2/3 of the EXTRA large loaf (I made lots because I just KNEW he was going to love it) went in the trash.

Since that fateful day I have learned just which dishes are strictly off limits to my creative tweaking (meatloaf, chili, pasta & tuna salad to name a few) and how to sneak in healthier choices into even the most sacred of dishes without getting caught. Meatloaf has still been a bit of a challenge, after a few more tries I came up with a version of a friend's recipe that involves a traditional meatloaf cooked potroast style surrounded in carrots & potatoes in a tomato based sauce. I've been making that one for the last year and a half thinking it was acceptable until I told hubby that our next post was meatloaf and he requested (several times over the course of several days and even after I agreed reminded me several more times) to make a "normal" meatloaf without the "extra stuff" with just the "normal" stuff. He also just about begged me not to add spinach (seriously that was over two YEARS ago!). SO this was another experimental recipe and I'm happy to say that I rocked it :)


Ingrediants:

meatloaf base:
1lb lean ground beef (90/10 or leaner)
3 hot italian turkey sausage links, squeezed out of the casing
1/2 cup coursly chopped portobella mushrooms
1 medium onion diced small
1 heaping tablespoon minced garlic
2 eggs, beaten
1/3 cup bread crumbs

Put all ingrediants into a bowl and smoosh well to mix. I HIGHLY recomend smooshing by hand, but if you're squeemish you can use a mixer... but seriously now what red-blooded woman doesnt like to get her hands in there and smoosh some meat?? Now I made my meatloaf base with plans to top with ketchup to make my darling husband happy BUT after hearing Lacey raving about her salt crusted meatloaf I wanted to attempt something similar. I was loathe to have another meatloaf florentine incident so I split the base in half and made two smaller loafs on my baking sheet. Here are your topping options:

Parmesian & Sea Salt crust:
Mix the following in a small bowl
1/4 cup parmasan cheese
1/4 cup course sea salt
1/4 cup bread crumbs
1 tsp garlic salt
1 tsp basil

Generously coat the outside of the meatloaf in the mixture, pressing it into the loaf so it sticks. Dump the extra on top and spread around evenly.

Traditional (ish) ketchup topping
Coat the loaf in brown sugar, you'll probably use about 1/3 of a cup
Top this evenly with about 3 tsp Hickory Bacon Salt (If you've never heard of Bacon salt you have been sorely deprived, J & D's bacon salt had changed my life, and it can change yours too! they have come up with a Kosher Certified way to make everything-even your envelopes-taste like bacon)
Spread 1/2 cup of ketchup over the top and sprinkle with a little more bacon salt (seriously, you NEED to try this!)

Whichever option you choose, or if you decide to be like me and split the loaf and use both (in which case use half of everything!) pop that bad boy in the oven at 375 for 50 minutes (if spitting the loaf cut cooking time to 40 minutes) allow the loaf to cool for about 10 minutes before cutting into the beefy goodness and enjoy. I personally thought both loafs were phenominal, the hubby preferred the ketchup topped loaf and polished off the leftovers within 3 days. That my dears is what I would call culinary success!!!!!!

Wednesday, November 18, 2009

Lacey's Smokey Cumin Chicken Couscous Soup

Couscous week. Huh. Filler food. Hmmm. Tried it once a while back, didn't like it. Bland. Boring. Blah. Not into this. At all. But in the effort to be a blogging fourchick team player I find a recipe that looks promising. (Sorry, I'm feeling a bit snarky bitch on this fine Wednesday night).

I come home cranky and ready to break open that expensive chocolate bar I've been hoarding in the top of the spice cabinet (yes, I really do have a whole three shelves dedicated to spice), and some wine, but try my damnedest to evade, evade, evade. So I get out my ingredients are start cookin'. Is damnedest a word?!?
Ingredients:
1 chicken breast (mine was already cooked)
2/3 cups couscous
1 sweet potato
1/2 onion
1 shallot
2 green onions
2 zucchini
1 can tomatoe puree (I have organic)
4-6 cups broth. I used veggie and chicken stock. If you like your soup more dense, add less.
3 teaspoons of cumin or more
1 teaspoon of curry powder
fresh thyme and italian parsley
juice of two mini limes (apparently they are key limes)
1 heaping teaspoon of really good smoked paprika (don't skimp on the crappy stuff, trust me)
1/2 teaspoon cayenne
sea salt to taste
pepper to taste

I chop the onion and shallot and cook in some olive oil. Doesn't shallot sounds like a french version of shat? Good thing they don't taste like shat or this soup would be a total waste, get it? ha ha.
Onions done, add in rest of veggies, chicken, spices, etc. etc. etc. And the couscous.
Photobucket

Let it all simmer together for about 1/2 hour and dish it up. It's goOod. It's healthy and whole grained nutritious. It's smokey. It's cuminy and curry-y. And spicy and sweet. The filler...um couscous...was even good for texture in relationship to the crunchy zucchini and sweet potato.
Photobucket
So when you come home in a snarky bitch mood like I did and all you want is some freakin' chocolate, but you can't because you're trying to lose weight, cook this instead. Just taste testing the broth while it was simmering was enough to pull me out of most of my SBM. Not enough to forgo the glass of white wine tonight, but enough to forget about the chocolate. (That was because I ate too damn much soup and am stuffed, but we won't tell anyone that!)

Oh yeah..I found this recipe at http://www.foodandwine.com/ and then changed it to my tastes at the time. Lime for my sour mood. Paprika for my devilled egg craving. Curry powder because I made pineapple fried rice the other night with it and am still on a big curry kick. Thyme and italian parsley because they were in my fridge....you get the idea.

Monday, November 16, 2009

Couscous Can be Creative!


Couscous.


It’s a funny word for a funny little food product. What is couscous you ask? It is a dish consisting of spherical granules made by rolling and shaping moistened semolina wheat (sweet corn) and then coating them with finely ground wheat flour. The finished granules are about one millimetre in diameter before cooking. It’s probably not your common, everyday food product served in American homes, but it’s a very tasty dish, very popular in Morocco and in the Middle East. It can be eaten alone, flavored, or plain, warm or cold (e.g., mixed with tabouli), or as a side dish. So, who wants to place bets on how each of the four chicks will cook theirs? Gourmet? Organic whole grain? Boxed mix? Sweet or savory? Tune in this week to find out! Whatever method it is prepared, it promises to be completely MARTHALICIOUS!!

Sunday, November 15, 2009

Lacey's Salt Crusted BBQ Chili Verde Sauce Meatloaf

Photobucket
There really isn't a good way to make a loaf of meat smothered in some sort of sauce look great on a photo. In my opinion at least. So there it is...
When making meatloaf I always look in the depths of the fridge and bottom most shelf in the door to see what bottled sauces have been lurking around a little too long so I can use them up. This time I found bag of shredded carrots, thai chili sauce and some gluten free Chile Verde BBQ Sauce I had picked up on my last trek to Whole Foods Market in the search of wheat and dairy free items my daughter could eat. And let me be honest here, I HEART Whole Foods. I wish it wasn't so far away (100 miles) because the store inspires me every time to try new foods and cooking methods. And their cheese section? O - M - G!
Grabbing the carrots, Chile Verde sauce and the rest of the ingredients on my meatloaf recipe roster, I tossed them all in a bowl:
Photobucket
Two packages of 7% all natural hamburger
2 eggs
small squirt of ketchup
about 3/4 cup of oats
1/2 cupish of bread crumbs
salt and pepper
around 1 cup of the Chile Verde BBQ Sauce
Pre shredded carrots I chopped up even finer - 3/4 cup
I put on some rubber gloves and got to work mushing and mixing it all up, saw it was too runny and added another dump of oats in. Perfect.

Get out the cookie sheet, place some parchment paper on top and dump out the meat mix. Form into a loaf with your hands (hence the "meatloaf" name). This time I got creative and got out my smoked Hawaiian Sea Salt and patted a good helping into the top of the loaf and it was definitely worth the use of the expensive salt.
Pop the meatloaf in the oven on 375 for about an hour. Mine took over an hour because the loaf was bigger.
Photobucket
I prefer this method over placing the loaf in a bread pan because all the juices and fat and stuff can run off the meatloaf rather than it baking in its own grease. And I've never had an issue with it turning out anything other than perfectly moist.

This version was much sweeter than my standard issue loaf, but that is to be expected with the Chile Verde sauce and the carrots. The salt crust on top made each bite a savory treat, I won't be forgetting to add that little marvel in again any time soon! We always have left overs, our favorite part. We enjoyed meatloaf sandwiches on roasted garlic sourdough bread all week for lunch. YUM.

Tuesday, November 10, 2009

Melissa's Magic Turkey Loaf


So this week the gals have decided to loaf around…with some meat huh?! This surely DOES mean trouble! When I decided to lose weight the first thing that was banned from my home was meatloaf and mashed potatoes because I simply cannot control myself with the combination. It makes my mouth water just to THINK of mama’s meatloaf and I have been known to clear an entire pan in a mere 24 hours…or less!

Although mama made one hell of a meatloaf, I think I can improve just a bit on her perfection and create it a little more healthy at the same time. ...At least we’re gonna try! So what CAN we possibly add to make a meatloaf MORE delectable, MORE tasty, MORE gourmet”ish”, MORE comforting AND keep it from causing a major artery clog? How about layer it with bacon and fill the center with 4 kinds of ooey, gooey cheese! Turkey bacon and reduced fat cheese that is...TOTALLY works for me! The magic of this meatloaf is how quickly it will disappear! Bon apetit’!
Magic Turkey Loaf

2 rolls 97/3 turkey sausage
1 package Onion Soup Mix
1/4 cup diced bell peppers
1/4 cup diced red onion
1/4 cup diced red bell pepper
2 eggs
8 slices turkey bacon
1/2 cup reduced fat mozarella cheese
Sauce:
1 cup ketchup
1 tbsp. Worchestershire sauce
1 tsp. brown sugar
Whisk until well blended.
Directions:
Saute veggies in about 1 tbsp. evoo. Let cool , then combine all ingredients in large mixing bowl except bacon and cheese. Really get your hands in your meat and knead well. Place 1/2 of the meat mixture in a baking pan. Layer with half the bacon and half the cheese. Top with remaining turkey mixture, remaining bacon and remaining cheese. Bake at 375 for about 45 minutes. Top with sauce and bake another 15 minutes until glaze is thickly coating the loaf and meat is done throughout. This is excellent served with curried sweet potatoes as shown above.

Thursday, November 5, 2009

Four Chicks Just Loafin' Around

This week the gals have decided to loaf around…with some meat! Ahem…the kind that goes well with mashed potatoes. Dang ya’ll.

Meatloaf is an all time, absolute, favorite, universal comfort food that makes taste buds tingle and dance with delight. Add a side of creamy mashed potatoes with bites of tangy tomato sauced meat and a little onion; how can you go wrong with that?! Not to mention you can use anything in the kitchen to make one, except maybe the sink.

So let's see what spin these four crazy chicks from across the country can put on mama's classic. Anytime the Hooker Cooker, Alternative ala Carte, Wild Card and the Gifted Gourmet get in the kitchen and play with...ahem...meat..., there's BOUND to be trouble!!!

Wednesday, November 4, 2009

Winter Squash Week!

Squash is a racquet sport played in an enclosed space. There are apparently five different kinds of balls used in the game, can you even imagine?? The court is encased in an effort to ensure onlookers don't get their own nads knocked off by the fast flying.....Okay, OKAY! WRONG SQUASH.
While The Four Chicks do sometimes like to envision balls flying (especially this week), we are not about sports on this blog. We are about food.

Hence: Winter Squash Week.

Whatever will we cook or bake? What kind of squash will we choose? Do we even like winter squash? Read on and find out!
Photobucket

Nikki's Belated Apple Squash Bake

I love squash and finding reasons to sneak it into any recipe I make is a guilty pleasure of mine (any way I can possibley trick the hubby into eating uber healthy food is exciting to me!). While squash on its own is tasty, a light, slightly sweet flavour, it readily absorbs other flavours from sweet to spicey.

This weeks surreptitiously healthy recipe is a spin on my grandma's baked apple recipe. Aside from tasting great, this stuff smells orgasmic... must be the cinnamon in it- did you know that the Queen of Sheba used cinnamon to lure King Soloman? Powerful stuff :)

Ok, first things first, I must include a disclaimer: you will be working with a sharp object, there will be cutting & peeling... The Four Chicks will take no responsibility for missing and/or maimed appendages. Any of you (and you know who you are!) who should not be trusted with a sharp object, please obtain assistance from a loved one for the cutting portions of this weeks recipe!!

Step One: Assemble your Ingrediants:
1) one small or 1/2 of a large butternut squash
2) 3 apples (you want equal parts squash & apple slices)
3) 2 tbs flour
4) 2-3 tsp cinnamon (I use 4 but I REALLY love cinnamon!)
5) 1/4 cup agave nectar (you can use honey or maple syrup, just make sure you don't use an artificially flavored Mrs Butterworth's-style syrup, use the real thing!)
6) 1/4 cup brown sugar
7) 3 tbs lemon juice
8) 1/4 cup apple cider (you can use apple, grape or cranberry juice instead, just stick with the 100% juice varieties)
9) 3 tbs cold butter

Step Two: Slice & Dice!

Cut the squash in half (please see disclaimer above) and scoop out the seeds. Cut the squash into large chunks and then slice off the skin (I tried using a veggie peeler but it really doesn't work well, using a knife is the easiest way but for the butterfingers out there, its also slightly dangerous... please dont lose a finger!). Next slice the big chunks into thin slices (you'll want them to be no more than 1/2 inch thick). Slice 3 tart apples (I used macintosh apples, granny smith would be good too) and slice them to the same size & thickness as your squash. I left the skins on mine, if you're not a fan of apple skins you can peel it off.

Step Three: Assemble!

Spray a thin layer of Pam in the bottom of your baking dish and spread the apple & squash in the dish, mixing it up evenly. Sprinkle about 2 tbs flour over the apples & squash. Over the top of that sprinkle 2-3 tsp cinnamon, 1/4 cup agave nectar & 1/4 cup brown sugar, next sprinkle 3 tbs of lemon juice then 1/4 cup apple cider. Next slice 3 tbs cold butter into thin slices, and cut each one of those in half and place them in the squash & apple (slide them down into the crevaces... wait that sounds dirty...).

Step Four: Bake!

Cover the dish with foil and bake at 325 for 25-30 minutes (until the squash is soft). Pull the dish out and let it cool for 5-10 minutes, as it cools the sauce will thicken a bit, now enjoy!

Tuesday, November 3, 2009

Melissa's Chicken and Squash Dumplings

If you were limited on the potential of squash, you won't be after this week's posts! Squash isn't just for casseroles anymore! There are so many varieties and it is such a versatile vegetable. Don't get me wrong, I love a good squash casserole that just screams Southern Comfort Food. This week however, we are taking squash in a very different comfort food direction...and we have selected the amazing butternut variety to accompany us!


Melissa's Chicken and Butternut Squash Dumplings

1 large hen
water to cover
1 tbsp. thyme
1 tbsp. basil
1 tbsp. sage
1 tbsp. pepper
1 tbsp. paprika
1 tbsp. seasoned salt
1 tbsp. parsley
1 tbsp. bay leaves
1 tbsp. turmeric

Place hen in pot, cover with water then add all of the spices. Bring to boil, reduce heat and simmer about an hour or until meat is thoroughly cooked and falling off the bone. Remove the chicken and set it aside. When cool enough to handle, skin and bone the chicken and shred or cut it into bite sized pieces.

Dumplings:
2 cups flour
1 cup cooked butternut squash, mashed
1 tablespoon baking powder
1/2 teaspoon salt
1/2 cup butter
1/2 cup water

In a large bowl, thoroughly mix the flour baking powder and salt. Add your squash.
Using a pastry blender, cut in the butter until it's well combined. Add water and knead 8 to 10 times. You can add small amounts of flour if the dough becomes sticky. Roll the dough out to and cut into 1-inch x 5 inch strips. Bring the broth back to a rolling boil, drop in your dumplings, cover the pot and reduce the heat to simmer. Cook for 10 minutes or until the dumplings are cooked. Add your chicken and remove from heat. Cover for 30 minutes to allow your broth to thicken.

A great accompaniment for these chicken and dumplings are another squash favorite...Squash Pickles! This recipe calls for your simple yellow crook neck squash:

Southern Squash Pickles

6 medium crook neck squash - sliced
1 small jar mustard seed
3 cups sugar
3 cups white distilled vinegar

Bring sugar, vinegar and mustard seed to a boil stirring constantly so sugar will dissolve and not burn. Add your squash, and let cook for approximatley 5 minutes. You do not want to over cook the squash and you will end up with mushy pickles. Prepare your canning jars by washing and placing in hot water, One at time, add pickles and firmly pack your jar. Fill with your juice. Remove all air bubbles, then wipe rim and seal with lid and band. Process the canned pickles in a boiling water bath for about 15 minutes. Allow to cool overnight, the check for solid seals by gently pressing the centers of the lids. If they do not press in at all, you have a good seal. If they have not sealed you can either attempt to reprocess or refrigerate. You can also add pimentos to this recipe for color and Viadlia rings for contrast if desired.


Saturday, October 31, 2009

Lacey's Chipotle Acorn Squash Sauced Enchilada's

Photobucket

2009 is the first year I've ever experimented with any kind of winter squash. I grew up on zucchini, yellow squash and my all time favorite patty pan's, but winter squash? Well...I can barely handle one sliver of pumpkin pie much less eating a winter squash as the main thing on my dinner plate. Ew. But this year however, I've rocked the winter squash. I made a ton of butternut squash and bleu cheese raviolis which are to die for good. This recipe though, this is one of the best things I've made in a very long time. Not. Kidding. (And it's not something to be baked really, so it was a shoe-in that I wouldn't fuck it up!)

Ingredients for the Enchilada Sauce:
1/2 baked acorn squash pulp- I love that you can buy them and pretty much ignore them for a month and they are still going to be good, unlike most veggies.
1/2 can Chipotle Peppers in Adobo sauce
1 garlic clove
1/2 yellow onion
sea salt to taste
1 tbsp butter (organic)
1 tbsp evoo (organic)
1/4 cup cream (organic)
3/4 cup chicken or veggie broth (organic)
Put this all in a food processor and blend the heck out of it till its creamy and smooth. It will be thick. You can thin it out if you prefer by adding more broth. A note here about the cream, you could use milk I suppose, but I had dipped my finger in the adobo sauce and it was super spicy. Cream helped tone down the spiciness of the sauce while keeping the richness of the squash intact. That is what I wanted. Milk=less calories. Cream=creamy goodness and better flavor. You choose.

At this point you could choose to use hamburger or turkeyburger, etc. but this sauce ain't your mama's enchilada sauce in a can. No Ma'am. Get buck wild! Go in a different direction.
Filling:
1 precooked chicken breast (yes, organic)
1ish cups of Chantrelle mushrooms (no I didn't go out and pick them myself. Costo people!)
2 cups fresh spinach chopped (organic)
Evoo
Cayenne powder to taste
1/4 cup enchilada sauce
Saute everything together in a pan until the mushrooms are just cooked and spinach is wilted.
Photobucket

As we are a family of three, one of whom is 3 years old and has Hand Foot and Mouth Virus at the moment (talk about a total freaking nightmare), I used 8 corn tortillas and saute'd one side of the tortilla in the enchilada sauce and evoo to soften them up.
Photobucket
I grated up 2/3's cup of 3 year old smoked gouda (Costco), filled the tortillas with meat, mushrooms and spinach mixture and layered the enchiladas into a cookie sheet. Down the middle of the enchiladas I spooned more sauce on top of the shells, sprinkled the gouda and put in the oven to bake for 15-20 minutes. I didn't spread the sauce all over the tortillas because I wanted the outside edges to be crispy deliciousness. And they were, they were!
There is nothing not to love about these enchiladas. They are creamy. They are spicy and rich. They are fantastic!
Photobucket

Credit where credit is due, I got this idea from my mom. Mom called to tell me about seeing Emeril make some enchilada dish with a squash this week on tv. So credit by way of mom by way of Emeril this sauce is an inspired delicacy.
As my husband and I were sitting at the table munching our enchiladas (more like inhaling them!), we came up with another idea for this sauce. Because it is thick and spicy and rich already, I am adding 1/2 cup of peanutbutter to it tomorrow night and using it over rice noodles, al dente veggies and shrimp for a thai peanut sauce!

Monday, October 26, 2009

Melissa's Drunken and Smoked Up Fudge

Melissa's
Drunken & Smoked Up Fudge

Sounds like this fudge has a bit of a substance abuse problem! All I can say is after one taste of this decadent fudge, you may walk away with an addiction of your own...IF you can still walk!

Ingredients:
4 tablespoons unsalted butter
3 1/2 cups granulated sugar
1 1/2 cups heavy cream
1/2 teaspoon salt
16 ounces Ghiradelli Chocolate
1 cup chopped Smoked Almonds
1 1/2 tablespoons Chambord Liquor
1 1/2 teaspoons Creme Fraiche
1/2 teaspoon almond extract


Directions:

Butter an 8-inch square baking pan and line with plastic wrap. Combine 4 tablespoons butter, sugar, cream, and salt in a saucepan. Over medium heat, bring to a boil, stirring frequently. Continue boiling, stirring frequently, to a temperature of 230 degrees F. This will take about 6 to 8 minutes. Remove from heat and stir in chocolate with a whisk until the chocolate is melted and the mixture is smooth. Add 1 cup chopped almonds and the liqueur and flavorings; stir to blend. Pour the mixture into the prepared pan and spread evenly. Cover with plastic wrap and refrigerate until firm, about 2 to 3 hours. Remove the top layer of plastic wrap and flip the pan upside down on a cutting board or platter. Let stand at room temperature for a few minutes then cut into small pieces.


Sunday, October 25, 2009

Lacey's Jameson Soaked Raisin Bread Pudding

First and foremost: Heat up the left over coffee in a mug, pour a knuckles worth of Jameson's in, add some cream and sugar and get yer drink on. Drinking Jameson's while using it to cook is a must. A must.
Second, put 1/2 cup of raisins in a bowl and pour enough of the same Whiskey over them to just drown them. Cover with cellophane and set aside on counter for 48ish hours. Keep drinking those Jameson's and coffee (aka Irish Coffee). They are good and good for ya. I know from personal experience.
Jameson family motto "Sine Metu" - Without Fear. In other words -this Irish Family does not fuck around with their booze making. Drink it at home. At least that way you can stumble to your own bed if you drink too much of it. It can hit you hard and fast and you won't even know it. The good thing about this recipe is that the alcohol bakes off (I think), so it's safe to eat at for breakfast or bring to a potluck. (Slip a flask of the whiskey in your pocket and you're golden).

Ingredients
Photobucket
In a bowl mix the following:
2 cups milk
1 cup cream
vanilla
nutmeg
cinnamon
3/4 cup sugar (I prefer brown but only had white at the moment)
3 eggs
3 tbsp melted butter
1/2 sliced and diced peach (optional)
Jameson soaked raisins and the whiskey they marinated in
Another pull of whiskey (optional, but come on! Do it!)

Cut up half a loaf of french bread and dice it into cubes no bigger than an inch. Dump the bread in the bowl with the liquid and stir it up so bread is evenly coated.
Photobucket

Pour bread mix in a casserole pan. Mine is a pretty green deep set dish that will have to cook longer. I believe this much woulf fit into a 9x9 pan. (At this point I prefer to put the casserole pan in the fridge for 24 hours before I cook it so the milk miture really soaks into the bread and becomes more custard like, but I didn't have time for it today). Bake it for 35ish minutes on 350 degrees. Once the top is crusty and golden it is done.
Photobucket

If you don't have any Jameson's in the house and don't want to spend $25ish for it, you can buy a cheaper brand of whiskey, bourbon or even rum to use. If you don't drink simply leave the alcohol out all together.
I've never met a person who didn't like bread pudding in one form or another. Personally savory bread puddings are my favorite to make and eat, but this was a nice change. And since I had my parents over night it worked out perfectly to serve for breakfast!

Friday, October 23, 2009

Booze Week!!!!!!

Photobucket

“Scuuuuse me occifer *hiccup*…I didn’t MEAN to drive *hiccup* (while swaying) into the back of your cruuuuusier…I certainly HAVE NOT been drinking…I just had one too many Irish Crème brownies or maybe too much Irish Creme IN my brownies…*hiccup*”

Brownies you say? Yes, brownies. Or whatever food we may whip up with a little booze.

Last week, 3 of the 4 cake recipes were cake-zasters. Maybe we should’ve gotten a little liquored up before we started. Anyway…we love cooking with alcohol. Sometimes, we even put it in the food.

Liquor and liqueur can add a distinctive flavor to both savory and sweet recipes without making you tipsy. There are a vast number of wonderful recipes which use some form of alcohol as an ingredient in sauces, marinades or as a main flavor ingredient. In general, the main reason any alcoholic beverage is used in a recipe is to impart flavor. Alcohol causes many foods to release flavors that cannot be experienced without the alcohol interaction. Beer contains yeast which leavens breads and batters. Some alcoholic beverages can help break down tough fibers via marinades. Other dishes use alcoholic content to provide entertainment, such as flambes and flaming dishes.

Our recipes this week will feature some sort of booze in them. Check back and see what we can do with a little alcohol

In the meantime, click here to enjoy the drinker’s alphabet. Drinker's Alphabet

Now GO!!!! Get ya drink on! (Or your brownies...)

Melissa's Mexican Chocolate Pound Cake


Melissa's
Mexican Chocolate Pound Cake

Who doesn't love a good pound.....cake? I do. Pound cakes are one of my specialties. But again, my role here is to evoke and encourage you to step outside your comfort zone...push yourself to new culinary heights...bake a pound cake like one has never been baked before! So, this will NOT be your grandmother's traditional, sissy pound cake nibbled with tea or coffee. Oh no, THIS will be a masterpiece of epic proportion....WE ARE USING MEXICAN CHOCOLATE WITH CAYENNE! Yes, we are. YES, you ARE. ....and you will like it!

***WARNING: If you are not familiar with baking pound cakes, I will advise you they are highly temperamental. Do not run, jump, shut a door, walk through your home, have any type of physical relations, turn on the water, multi task of any sort, yell, hell whisper for that matter, or breathe heavy. Your best best is to leave your home from the time you place the cake in the oven until it's time to come out. I am not kidding. I have lost many a pound cake to a good solid Carolina Gamecocks Touchdown. (Think I'm kidding...um, no.) If you do any of these things the cake WILL know. It will fall...Just to prove a point. Pound cakes will throw a two year old temper tantrum and you will be stuck with a pan of half baked, half fallen, half crusty....goo.

So with that said, let's get baking!


INGREDIENTS
1 cup butter
1/2 cup solid vegetable shortening
3 cups sugar
6 eggs
2 1/2 cups all-purpose flour
1/2 teaspoon baking powder
1 cup Mexican Cocoa with Chilis
1 cup milk
1 tablespoon vanilla extract
1/2 tsp. cayenne (YES that says Cayenne...TRUST ME!)
DIRECTIONS
In a large mixing bowl, cream butter and shortening with sugar until fluffy. Add eggs, one at a time, mixing well after each addition. Combine flour, baking powder, cocoa and cayenne. Add flour mixture alternately with milk and vanilla to the butter mixture. Mix well. Pour into greased tube pan without removable bottom. Bake at 350 degrees F for 1 hour and 20 minutes or until cake tests done. Cool 15 minutes before removing cake from pan. Cool on wire rack.
Photobucket

Now comes the best part. You HAVE to taste test while it's warm. If baked correctly you'll have a nice crispy top crust with an amazing chocolate flavor heightened by the cayenne. This will not burn you a new asshole as one might think, as long as you only use the amounts given.

I will tell you this...I entered this cake in the state fair this year and boy THAT cake gave Judge grandma quite a surprise!!! Bon apetit'!

PS: Unlike my counterparts, this is a successful cake recipe you can absolutley try at home!
Photobucket

Thursday, October 22, 2009

Lacey's FML Rainbowish Lemon Drop Cupcakes

So..Cake week was supposed to be fun. I mean, its cake! I even bought a box of organic cake mix thinking to myself "it's boxed, I cannot screw this up!" Unfortunately sweets+baking=a whole lot of cussing reared its ugly head again and guess what? We tasted the rainbow, but the cupcakes looked more like a crusty rain puddle. Now I cannot say I didn't have fun while making these as I had my 3 year old daughter Gracie help me and she loves to cook, (or mostly get in the way, but who's complaining? I definitely don't want to discourage the girl) but still. I want pretty cupcakes. Not blown out holes in the middle cupcakes!

If you look up rainbow cupcakes on the internet you find these gorgeously colored cupcakes with blues, reds, yellows, etc. and pretty piped frosting on top. They look like a dream and I couldn't wait to make them. So we get our ingredients layed out...boxed organic cake, three eggs, two tbsp melted butter, vanilla, food coloring, lemon drops crushed up in a baggie, cupcake liners, etc.

We mix the boxed cake, eggs, candy, butter...divide the batter up into four bowls, add food coloring to each and stir it up. Next, line the cupcake tin and start spooning in the colored batter in the liners color by color. Pop them in the oven for 12 minutes at 350. Dunzo.
At 12 minutes I look in the oven and see that the cupcakes have WAY overstepped their cupcake liner bounds and are jumping OUT all over the damn place. But they look wet still, shiny. So I let them cook for another two minutes. I mean at this point, what does it matter. They are gonna look like colorful chantrelle mushrooms rather than the perfectly formed visions I saw on the internet.
Photobucket

Apparently the shiny was the three eggs the organic cake mix called for! After thinking about it, WTF is that all about? I've never seen a Betty fucking Crocker call for 3 eggs! Now my cupcakes are cookie on top, cupcake on the bottom. Okay.

I whip the whip cream with sugar and vanilla, add in a ton of the crushed lemon drops and whip some more, so its really stiff. I put all of that into a baggie, cut the tip off and squirt it out onto the cupcake. I was going for a dreamy creamy look, but honestly it looks like soft white dog poop on a colorful chantrelle mushroom on a plate. FML. Gracie wants sprinkles, so we dress the poopshroom up with some purple and pink sugar and eat up.
I gotta say, the cupcake tasted pretty damn good for what they looked like. I am going to buy this boxed cake again to make batter as listed on the box and then make cookies with it. I mean, surely I could do that right? It involves over baking and all...right?

Wednesday, October 21, 2009

Nikki's Fabulous Weight Loss Mini Carrot Cake Cupcakes!!!

"Gauranteed to make you lose weight"
*disclaimer, you will only lose weight if your only food option is Nikki's Fabulous Weight Loss Mini Carrot Cake Cupcakes*

I've made carrot cake layered in cream cheese icing several times and am quite convinced that while carrot cake is good, cream cheese frosting was invented by angels who, in their infinite generosity, deigned to share their gloriously luscious creation with us mere mortals who are entirely undeserving of its magnificence... in other words: cream cheese frosting is YUM! However I am attempting to be healthy and have been thinking about making a healthified version of carrot cake for awhile. Also I love anything in miniature, there's something about bite sized foods that make my heart go pitter pat... maybe its the fact that I can eat THREE bite sized brownies/cookies/cupcakes/perogis for every ONE normal size one... and three is way better than one... right? So, I geared up to create the most amazingly delicious desert that anyone had ever tasted. I had already invisioned myself handing out the beautiful little confections to my friends and coworkers, being ever so modest as they showered me with compliments, sharing in their astonoshment that these dainty morsels of ambrosial perfection were actually *gasp* HEALTHY!

yeah... it didnt quite go like that...

I started with my basic carrot cake recipe that has never failed me before, it calls for such fattening delights as buttermilk, oil, butter, cream cheese and above all SUGAR! I started editing from there and decided that I could sub out applesauce & mashed banana for the oil, and since those are so sweet on their own I surely wouldn't need sugar. I replaced the buttermilk with greek yogurt and replaced some of the white flour with a Bob's Red Mill high fiber cereal. I guess I should have sensed that this wasn't going to work out after my new gadget didnt work... I found this mandoline style slicer/grater thingy for only $3.99 at my local discount store... yes I do realize that if its $3.99 there's a reason... and its not that the benevolent manufacturers created such an amazing product that they just HAD to share it with the world with no concern about profit... anyway it was plastic and POSSIBLY would be good for grating something really soft... like velveta... although that might still be to hard... but never fear I have my black & decker handy chopper and although it took several batches to come up with 2 cups of carrots they were perfectly evenly pulverized... I added all my ingredients (seriously they tasted so bad I'm not going to bother giving you the breakdown... you don't want to know it!) and tasted the dough... it wasn't bad... it wasn't a dainty morsel of ambrosial perfection yet... but hey my regular carrot cake isn't really that amazing uncooked either.

So I lined my mini muffin pan with cheerful rainbow liners and filled them with the dough, popped them in my oven and sat back to wait for the magic to happen... They smelled amazing which I decided was a preliminary indicator of their impending magnificence. After checking them several times I decided they weren't going to fully set no matter how long they baked so I pulled them out, let them cool a few minutes and (slighlty giddily) took the first bite... and almost spit it out... This couldnt be! My perfect little treats were... BITTER?!?!?! I tasted another one (yeah yeah I know they all came from the same bowl of dough, if one is nasty they all are gonna be... but a girl can hope right?) that one was gross too so that batch went in the trash. After agonizing consideration I decided that I should add some sugar... not a lot, just 1/3 cup to balance the bitterness a bit... enough that I was already feeling the first twinges of failure though... these would not be the perfectly healthy delights I had envisioned... That didnt work either and I finally gave up for the night. I froze the remaining dough just in case I come up with a blast of inspiration on how to fix it (suggestions? anyone?) cleaned up the mess and got a glass of wine to console myself... I take culinary imperfection very personally...

I won't go into detail on how I managed to screw up the cream cheese icing... suffice it to say it wasn't much better than the cupcakes...

Friday, October 16, 2009

CAKE!

Cupcakes, birthday cakes, spiced cakes, fondant cakes, boxed cakes, scratch cakes, Cake the band. Millions of kinds of cakes. It’s sweet, it’s fluffy, it’s delicious. Sometimes it's even nutritious. Wedding cakes, anniversary cakes, better-than-sex-cakes and now divorce cakes. There are Beefcakes, piece of cakes, and loving you like fat kids love cakes. We heart cakewalks. And we let them eat cakes! Ode to CAKE!
Photobucket

Up next week: Alcohol! Yeay us!

Thursday, October 8, 2009

Nikki's Savory Sausage Squash Casserole

Ok a quick disclaimer: you're going to see me do a LOT of cooking with italian sausage. Aside from the fact that every girl loves a bit of sausage (wink wink) italian sausage is an EXTREMELY easy ingrediant to cook with, its pre-seasoned, you can serve it whole, slice it into chunks or squeeze it out of the skins and use it as ground meat. It also adds a lot of flavor for a small cost to everything from soups to burgers to casseroles. I don't have a ton of discretionary income for fancy spices and I'm perpetually either running late home from work or making dinner in the middle of finishing up work (hubby's not such a fan of the air card that enables me to access work email 24-7... sorry babe, a girls gotta stay connected in the corporate world!) so I need easy ingrediants that give a ton of flavor for minimal effort & cost.

Now that thats out of the way, ON TO THE COOKING! woo hoo!

Now aside from my love of sausage, I also love finding alternative healthier ingrediants for really filling foods. Most casseroles call for things like cream of chicken or mushroom soup (holy high sodium!), potatoes or pastas, what I'm going to share with you today uses squash with just a little milk & eggs to bind it all together. If you've never had squash before or have and weren't a fan, stay with me here, I gaurantee this is going to taste 1,000 times better than what you're imagining right now!

Oh and before I start I'll add a disclaimer for any vegetarians out there, this dish can very easily be converted to veggie-friendly by replacing the suasage with mushrooms. Keep in mind though that I'm using the sausage for much of my flavor so you'll want to add more seasings. I'd recomend 1-2 tsp each italian seasoning, cumin, salt & pepper, and double the chili powder & red pepper flakes that I'm using.

You'll need one small or half of a large butternut squash. Cut the squash in half and scoop the seeds out of the bell part. If you're one of those that shouldn't be trusted with sharp objects (you know who you are!) please have a loved one handle this part... Now put the squash cut side down into a baking dish with about 1 inch of water and stick it in the oven at 375 for 40-45 minutes or until you can very easily pierce it with a fork.

While the squash is baking you can start on the rest of the casserole. You'll need about a pound of hot italian sausage. Normally I go for turkey but the regular pork sausage links were on sale this week so thats what I'll be using. Squeeze the meat out of the skins and put in a big skillet (if you're using turkey I'd recommend spraying with Pam first!) and break into chunks. Cook over medium-high heat continuing to break apart until there's no more pink. This sausage is a bit greasy so I'm putting it on a plate with some paper towels to soak up some of it.

Pour off the excess grease then put 1 small onion, diced, into the skillet to cook over medium-high heat. I didn't clean out the skillet so that I wouldnt need to add any more oil & so the onions would absorb some of the flavorings. If you're using turkey the you'll need to add some oil. Add about 1 tablespoon of diced garlic and allow to cook.

While the onions cook dice up 3-4 sweet bell peppers (you want about 1 cup). Now I'll share my top secret way to cut peppers with ease... I think I saw it on some Food Network show... anway:
1) slice off the very top of the pepper (don't worry if the stem is still attached)
2) turn the pepper and slice off the very bottom
3) make a cut straight down the side
4) peel the pepper away from the seeds & stem and discard
5) vioala! you now have a nice sheet of pepper that is rediculously easy to slice into strips :)
Toss the peppers into the onions and add 1 cup of frozen corn. Cook over medium heat until everything is heated through and add 1 tsp chili powder & 1 tsp red pepper flakes and toss the sausage into the mix. Remove from heat and set aside while you deal with the squash.

In a medium sized bowl combine two egg whites with two whole eggs and mix them up well.

At this point the squash should be done baking (can you easily stick a fork in it?) carefully take it out of the oven and scoop the insides out. When I say carefully... I really mean it... its HOT! Put a very little bit of the hot squash guts into the eggs to temper them (if you dump all the squash in at once it'll start cooking them and you'll have chunks of scrambled eggs in your casserole... which you might like... however its not what I was going for... Anyway add just a little bit at first then dump the rest in and mix it up. You can use a hand mixer, however I just LOVE any opportunity to use one of my FAVORITE cooking gadgets: the pastry cutter!!! (cue angels!). Now I'm not sure that I've ever used the pastry cutter for actual pastry cutting... however its EXCELLENT for making chunky mashed potatos or sweet pototo soufle... and it looks like an impressive cooking tool... Mix the squash & eggs together and add about 1/4 cup milk (I used 1%) then add the meat & veggies, give them a stir and dump them out into a casserole dish (pre-sprayed with Pam). Top with about 1/2 cup shredded low fat cheese & another tsp of chili powder and stick that bad boy back in the oven at 375 for 20 minutes and you have dinner!

One of the things I love about squash is its versatility, this recipe was adapted from a similar one that called for potatoes (it also tripled the cheese & added cream of chicken soup but we won't go there today) If you're watching your carbs & calories squash is a GREAT tradeoff and can be used in a TON of different things. Squash has half of the calories & carbs as potatoes and in this recipe if you didnt know the squash was there all you'd notice is a orangey color that most would attribute to more cheese. Don't get me wrong now I love potatoes in all of their baked, fried & smushed forms, and potatoes DO have twice the protein & potassium, but to shave off some extra calories I'll gladly make this swap :)

Monday, October 5, 2009


Melissa’s "Q+FM”

Is your curiosity peaked? Are you wondering? Do I have your undivided attention? Hmmm? I mean anything goes in THIS column, right? Sounds like a bad word doesn’t it? …or something you’d create in the bathroom, not the kitchen. (She giggles.) Well, this week, you’re safe…this IS in fact, created in the kitchen, with all natural, (hehe), EDIBLE, ingredients. What were you thinking? Jeez…

Over the weekend, we welcomed friends from out of town to our home. While planning for their visit, I was also planning this week’s casserole column. I thought what better way to welcome our friends down south, and combine my two tasks at hand, than with some ole’ fashioned southern comfort food! (They’re Yankees. We forgive them for that.) To me, comfort food=casserole = none other than Mac N Cheese! I mean really guys, what else?

Wait! What? The Gourmet is going to make…macaroni and cheese? Absolutely! Macaroni and cheese has gotten a bad crap wrap since the invention of the crap in a box…no offense Kraft. Trust me, in this recipe you will not find a cardboard box, or any packets of cheese like powdered substances. You KNOW any old mac n cheese, simply will not do here. What we need to do is add some pizzazz! We need umph! We need to be creative and let our real, unprocessed, cheeses flow! WE are going to create a masterpiece of pasta and cheese, an adulterous affair of beautiful, sexy, flavors…we are going to create…drum roll please… Quattro+ Formaggio Macaroni.

Ingredients
1 tablespoon olive oil
1-inch thick piece pancetta, cut into small dice
3 tablespoons all-purpose flour
2 cans evaporated milk
3 eggs
2 teaspoons finely chopped fresh chives
1 teaspoon paprika
2 1/2 cups freshly grated Asiago cheese , plus more for the top
1 1/2 cups New York Cheddar
1/2 cups Shropshire Blue (Or your favorite Bleu Cheese)
1 cup grated Fontina cheese, plus more for the top
1/2 cup freshly grated Parmigiano Reggiano, plus more for the top
½ cup Grated Percorino
Salt and freshly ground black pepper
1 pound elbow macaroni, cooked
1/2 cup coarsely chopped flat-leaf parsley

Directions
Preheat your oven to 350 and butter your bottom…of the dish. Although that does give me some ideas for later…Heat your oil in a large sauté pan over medium heat and brown the pancetta until crisp. Place your pancetta on a separate plate reserving your cooking oil to begin your roux, a fancy name for crap that will thicken your mac n cheese. Whisk the flour into the reserved oil and cook for 1 to 2 minutes. Then whisk in your evaporated milk, increase your heat and continue whisking constantly until your mixture is thickened. You now have a roux. Next, whisk in the eggs until incorporated and let cook for 1 to 2 minutes. Remove from the heat and whisk in the herbs and seasonings, and all of the cheese until completely melted. If you want to add some cheese to the top, reserve about ½ cup for that purpose. If not, throw it all in.
Place the cooked macaroni in a large bowl, add the cheese sauce, pancetta and parsley and stir well. Next put the mixture into your buttered bottom dish. If you reserved cheese for the top, add it now. Bake your mac n cheese until the top is lightly golden brown, 15-20 minutes. Remove from the oven and enjoy!

Now there is the REAL way to enjoy REAL macaroni with REAL cheese. Now that you have no excuses on how to prepare or enjoy REAL mac, n REAL cheese, please don’t let me catch you with any cardboard boxes in the future. It could get ugly. Save those for the recycling plant!

Sunday, October 4, 2009

Lacey's Mixed up Vegetarian Lasagna Casserole

I don't make many casseroles, but when I do I make them on Sunday night so all I have to do when I get home Monday is pop them in the oven to cook. I don't know what it is about Monday nights but by the time I get home I am dead ass tired and want nothing more than to sit down and not move until it's time to go to bed. I've got a few casseroles up my sleeves that I can make on a dime, but for this week's blog posting I really wanted to try something different. Plus I had a major hankering for lasagna but did not want to go to the trouble of making it.

Casserole = Yummyness in a pan, easy and quick. Lasagna = Delicious, not easy and definitely not quick. Oh and to make a lasagna usually means spending about $25ish in cold hard cash. Luckily this time I had every single ingredient already in the fridge or my garden. Another thing I look for in a casserole is the "one stop meal" effect. I don't want to have to make anything else with it. I want all the food groups covered in that one pot. This recipe fits that bill nicely.

I perused the internet and found a recipe by that blonde mogul everyone loves to hate even though we all use her recipes and products. She calls it Pasta Cake. Since I'm not flipping mine out of a springform pan onto a cake plate for a dinner party, I'm calling mine a casserole. So take that you...you...Rich Bitch! Ha!


My recipe is a bit different than the one on the internet, here it is:
Pasta - I used left over fresh scraps from raviolis I made a week ago. I'd say it was about 3 cups worth.
Ricotta cheese - I had fat free, the smaller container
Parmesan cheese - 1 cup grated (I used Grana Padana) -keep 1/4 cup aside for topping the casserole
Eggs - three organic
Fresh Tomatoes - 6-8 chopped up (from my garden)
Eggplant - one..or you can use zucchini (from my garden)
Spinach - chopped. Three cups if you were to stuff it into a measuring cup
Garlic - 6-8 cloves chopped into chunks
Onion - one whole chopped
Evoo as needed for pan
Spices - italian seasoning, salt, pepper
(An even easier version of this recipe would be to substitute out the fresh veggies for canned diced tomatoes, and hamburger, turkey burger or sausage).

I also had some butternut squash left over and chunked it up and added it to the mix - don't. It was too dry after cooking. (I'm just adding this because you might see it in the pics below).

Turn oven on 425, chop up tomatoes, onion, garlic and eggplant. Toss lightly in evoo, spread over a cookie sheet and roast for about 25 minutes.
Photobucket

Boil your pasta in water and about 1 tbsp salt (trust me, it really does make all the flavor difference if you add alot of salt) and 1/4 tsp evoo so the noodles don't stick together.
Photobucket

In a large bowl, mix eggs, ricotta, about 1/2 tsp salt, 1/4 tsp pepper and 1 tbsp italian seasoning. Once the veggies are done roasting, add them and the pasta to this bowl and mix everything together. Coat a 9x12 pan (or a large round one like I've got), dump all the ingredients in and spread out flat. Sprinkle the rest of the Parm on top and bake at 350 for about 30 minutes or until bubbling and golden brown.
Photobucket

Once out of the oven, let the casserole sit for about 5-10 minutes to both cool and set up. Slice it up and let your family dig in. Not only have you saved time, you will probably have left overs for lunch the next day or another dinner later in the week.
Photobucket

Tuesday, September 29, 2009

Ladies, It's Casserole Week!

Casseroles in America are a Wham! Bam! Thank YOU Ma’am! style cooking. Cheap, easy, quick and dirty. On Wiki someone defines casseroles as a dish containing a meat, vegetables, a starchy binder and possibly vegetable stock or booze (might be) added along the way. STOP RIGHT THERE! Booze in a casserole?? That is our kind of cooking! Alas, Booze Week is coming up soon, so we’ll just drink the alcohol we’ve stocked up on in preparation while we cook and look forward to the day. Hmm...We’d better add a bottle to the grocery list because it’s lookin’ a little low.

Okay back to Casseroles. Sorry. Our minds wander. Casseroles are today's working woman's chance to emulate the 1950's Efficient Housewife. They can be made in minutes – boil noodles, add tuna and cream of mushroom soup, stir and done. They are a great way to use up leftover meat and probably one of the most cost effective ways to feed a family. And the range! Noodles, potatoes, tortillas, vegetables, beans, what doesn’t go in or hasn’t been used to make a casserole?

Let’s face it ladies, when you’ve had a long day at work, there wasn’t enough caffeine in the world, your kids are screaming and your feet hurt from walking in heels, casseroles are a fucking quick meal. They just scream Monday night. So whip one up, put it in the oven to bake and sit down to enjoy a glass of wine...or a dry vodka martini with two olives, one onion. Either way, kick off those heels, enjoy that glass of muscle relaxer and make a casserole!
Photobucket

Nikki's Ultimate Comfort Food: The Sandwich(es)

When initially presented with the challenge of coming up with a sandwich recipe I started thinking big: maybe a panini with fresh basil, mozarella, sun dried tomatos, a fancy home-made sauce.... Then I really considered it and realized that for me a sandwhich is all about convenience and above all: comfort. Realistically I'm not going to put that much effort in a sandwich, I just throw crap in between two slices of bread and take a big bite... if its not working I add more crap... the other day for example I ended up with sharp white cheddar cheese, 4 bbq chips, 3 cheddar sour cream chips, lettuce & green peppers... it was pretty damn tasty... and about as gourmet as I'll ever get with a sandwich. So rather than create something spectacularly new that I'll never make again I'm going to share my go-to sandwiches for cruddy days:

Grilled Cheese (to be served with tomato soup of course)
Ingredients:
2 slices of good hearty bread (I'm using whats left of my pumpkin oat-nut bread)
1-2 slices of sharp cheddar cheese (NO american cheese allowed!!)
butter
non-stick skillet with a lid
spatula for flipping

Ok now that we've assembled our ingredients, lightly butter the pieces of bread on one side only, place one slice of bread, buttered side down, on a skillet over medium-high heat (if you dont use a non-stick pan I'd spray some pam in there first!) next layer on some good sharp cheddar cheese and top with the second slice of bread, buttered side up and put the lid on the pan (the lid traps the heat and helps the cheese melt... if you MUST use American cheese leave the lid off, it doesn't need help melting... better yet throw it away and go buy some real cheese...). Allow to cook for about 1 1/2 minutes, remove lid and flip. If the cheese is fully melted then leave the lid off, if not then put the lid back on until it is. If you have to put the lid back on you'll want to flip the sandwich over and re-brown the top because the lid also traps moisture and a proper grilled cheese sandwich must have a little bit of a crisp to it :) Allow the bottom to cook until it gets to you liking, I like mine with a little char, then plate it up and serve with tomato soup. Delish and perfect for a chilly fall day!

My next sandwich is one I concocted as comfort food. When I was little my mom would smear peanut butter on bananas for snacks, that has stuck as one of my favorite comfort foods but after seeing a seeing an Elvis sandwich on a menu once (that one had bacon... I'm not so sure about that!) I realized it could be so much more :)

Nikki's Elvis Sandwich:
Ingredients:
2 slices of bread (again I'm using my pumpkin oat-nut bread)
peanut butter
honey
1/3 of a banana, cut into very thin peices
cinnamon

First lightly toast your bread (you dont want it super crunchy, this is mostly just to heat it up) then spread a nice thick layer of peanut butter on one slice of bread, layer on your banana slices and drizzle with honey. Sprinkle just a dash of cinnamon on top and put the other slice on top, and enjoy!

I hope you enjoy my favorite sandwiches :)
Melissa's
Eggin’ Pancetta Croissant

Sandwich = crap shoved and/or stuck between two holding objects, usually of a bread nature. Well that sounds like a culinary adventure… NOT! BUT…it could be!

Welcome to the wonderful world of sandwiching, more affectionately known as Sammies. Sammies can provide you with everything from a quick grab and go lunch to a full meal for the masses. And again, the possibilities are quite endless.

In determining which Sammie I’d share with you today, I took a family poll. I asked them, “What’s your favorite sandwich of all time?” to which they responded with a, “You have GOT to be kidding me…” stare. I was quite confused for a moment knowing we had all eaten sammies at some point in our lives. Finally the cloud was cleared when my teenage daughter, in her infinite wisdom, said, “mom, I have eaten at least a million sandwiches, how can I possibly pick a favorite?” It was actually quite an eye opener. “Would you like me to pick a wrap, a panini, subs, muffaletta or do ice cream sandwiches count?”

Hubby responded in much the same way. “Well I like that one you make with the peanut butter, apple and bacon and then I really like just a good old grilled cheese or a PB&J. But, oh I like the turkey clubs too and the Monte Cristo with the turkey and apricot preserves. Does that include wrap and subs? And Oh, what about Philly Cheesesteaks or a good burger…is THAT a sandwich?” OK. OK. I get the point.

After much debate on the home front I decided to share one of my personal favorites that begins with a simple egg salad, but adds a little gourmet flare with a little crispy pancetta. Today our culinary adventure in sandwiches will take us to the far corners of the kitchen cutting board to create the ultimate Eggin’ Pancetta Croissant!

Eggin’ Pancetta Croissant

6 hard boiled eggs
¼ cup mayo with olive oil
3 tablespoons sweet pickle juice
12 slices pancetta (Italian bacon that has been cured in salt and spices and then air-dried. )
6 butter croissants
Salt & pepper to taste

Begin your egg salad by mashing your boiled eggs. I like them a little chunky, but that’s personal preference. Next, mix in your mayo, pickle juice and salt and pepper. Blend well and chill. I meant chill the egg salad, not you! You’re making a delicious Sammie…You can chill later WITH your sammie! Next, place your pancetta in a pan and brown until slightly crisp, like you would prepare bacon. Finally, assemble your Sammie on the croissants with a little lettuce on the bottom, then the pancetta, then top with a nice scoop of egg salad. These are awesome for picnics and for a light spring luncheon or brunch. They also keep well wrapped in plastic wrap in the fridge.

Yes, we’re done. NOW you can go chill with Sammie in hand! Bon appetit’!

PS: I apologize for the lack of photos with this recipe. Some were mutilated in the making of this Sammie. Then I figured, hey, you guys KNOW what boiled eggs look like right?

Sunday, September 27, 2009

Lacey's S(eductive)AND(evilishly)W(ondrous)-ICH Sandwich

What!? you say can possibly be seductive about a sandwich? Ask you husband or significant other about what makes you sexy in a hot dress? He'll say in not so many words that the dress hugs your curves, your cleavage shows just enough to keep him looking, and the Sexy As Hell F*ck Me Stilletos give you the confidence to pull it all off. In guy-speak: Baby you should wear that dress and those shoes all-the-time!

Sandwiches can be simple just like a tshirt and jeans, or they can be more exciting like that hot dress and stilletos with a few simple substitutions. By "dressing up" a few of the ingredients we can easily improvise the rest - just like we do every morning we go into our closets and flip thru the hangers until we find something to wear.

Today, we go meatless...we're going to go lite on the spreads and add a little cheese instead (Hey! I rhymed!)

Ingredients:
Dress up the bread - buy something hearty like a baguette of sourdough or artisan bread with herbs. If you don't use all of the bread for these sandwiches, freeze the rest in an air tight bag for later. There are lots of things you can do with bread. For this recipe I'll be using the bread I made in last weeks blog. Slice the bread into 1/4-1/2" thick pieces. Lay 4 pieces flat on a cookie sheet. Preheat oven to lo broil.

Cheese - you don't have to spend alot of money on cheese to have it taste good. Dubliner's Cheddar or a nice Gouda cheese is always great to have in the fridge. For sandwiches I prefer to use a cheese that is strong in flavor because we often eat meatless sandwiches. Also, I like a variety that isn't going to make the sandwich soggy (that isn't sexy at all). I used some Grana Padana (similar to Parmesano Regiano) and some Sage infused Cheddar (the green stuff in the pics below). Slice cheese into 1/8"ish slices, place on top of bread.

Spread - rather than use mayo or mustard, make your own healthier and more flavorful version: 1/2 cup nonfat plain yogurt (I used greek)
1/4 cup olive oil
1 egg yolk
2 tbsp grey poupon
1 tsp lemon juice
2 garlic cloves
1 tsp spices - use what you like. I usually have italian seasonings on hand, so I used them.
Salt and Pepper to taste. I prefer to use a good sea salt.
Place all the above sauce ingredients in a blender/food processor and blend long enough for the garlic to get chopped up.

Photobucket

Once blending process is done, place sauce in an airtight container and put in fridge. The egg will help keep the olive oil and other ingredients emulsified. Once the sauce gets cold it will be approximately the same thickness as grey poupon. If kept in a good container in the fridge, this will last up to two weeks.

Slice two tomatoes and place on top of cheese, stick these into the oven until cheese is melted and bread is slightly toasted.

Photobucket

While the bread/cheese/tomato combo is broiling, slice up some lettuce (preferably not iceberg since it is essentially worthless in terms of nutrition). I had a lemon cucumber from the garden, so I sliced it up too. As for lettuce, it will be a deep red and green for me. Put it in a bowl, or on the cutting board and drizzle with some good balsamic and evoo, add a little sea salt and pepper. Mix it up. If you don't have balsamic, you can sub in some salad dressing. But we're trying to go lite here, so don't pick a heavy dressing. The cheese and the sauce spread will be strong in flavor already.

Photobucket

Once the cheese and bread is toasty, take it out of the oven and let cool. Place bottom halves on a plate, top with your homemade spread, layer the lettuce salad (and cuke if you added it) and top with the upper slice of bread.

Photobucket

At this point if you are salivating at the aromas and beautiful colors in front of you, eat away..but part of making a Sexy and Devilishly Wondrous Sandwich that will give your hubby the "ich" is all about presentation. I picked up an oblong recycled glass platter at Target on clearance for $7.99 the other day, and it is perfect for this meal. Layer your sandwiches on the platter, add any leftover salad in a pretty pile on one end/side and wipe off any drips or drops that landed on the plate.

Place it in the middle of your dinner table, fill a couple glasses of good wine, light a candle or two..put on an unstained shirt, maybe even some cute high heels and tell your man that dinner's on the table. And don't be surprised if you hear him say "Baby, you should make these all the time!"

Photobucket

Wednesday, September 23, 2009

Sandwiches, a Staple of Survival


While trying to write this week’s blog description, I decided to see what the “official” definition of a sandwich was. I was overwhelmed by what came up when I typed “define: sandwich” into google:


1. To insert or squeeze tightly between two people or objects
2. A Filipino rock band that was formed in 1995
3. A town in Barnstable County, Massachusetts
4. A 2006 Bollywood comedy film
5. A parliamentary constituency in Kent
6. sexual behaviour involving more than two participants at the same time (yes, it said that!)
and…
7. two (or more) slices of bread with a filling between them

This week’s blog is focused on the latter of the definitions I found. Although, you just might find a couple of other sandwiches thrown in there…ice cream sandwich, or knuckle sandwich if things don’t go well! Sandwiches have evolved a lot from when I used to have them as a child. There are SO many types of breads, veggies, meats, cheeses and spreads that are acceptable sandwich components now days! It no longer has to be plain old sliced bread…there’s Ciabatta bread, pita, wraps, croissants, you name it! American cheese? Puh-leez! Now we use artisan cheese like chevre, havarti, manchego, and gorgonzola. Meats are still kind of limited, as I do not believe God created any new animals to slaughter but we still have beef, poultry, venison, buffalo, fish, lamb, etc. And spreads can be fancy mustards and mayos, or dressings, you get the picture. Sandwich combinations are limitless! I used to eat a sandwich with American cheese and strawberry jam. So see? You are only limited by your own imagination! So this week we offer you the four chick’s sandwiches. And no. I’m not referring to definition number 6 above. Contain your disappointment. Because once you read our sandwich blogs you will want to rush into the kitchen and make a sandwich of your own!

Monday, September 21, 2009

Nikki's Savory Oat-Nut Pumpkin Bread

Ok so I love bread. I mean, I love ALL bread, whole wheat and white, rye and pumpernickel, sweet breads, savory breads, muffins, croissants, you name it, I'll scarf it down :) now... MAKING bread on the other hand... just the idea is enough to break out in hives while rushing to Panera to buy a fancy loaf, to heat up in the oven and claim I baked it (yes I have done that... and no, no one believed me...) the one and ONLY time I ever attempted to make bread I was 19 and had the bright idea to make a Thanksgiving dinner, from scratch, for 10 friends with little to no assistance and in between the mayhem I suddenly remembered my bread dough that I had left rising on the counter. I went to inspect it and it was just sitting there, looking exactly as I had left it... not even an 1/8th bigger... I poked at it a bit, choked back a few tears... and sent a friend to super walmart for rolls... it was an extremely disheartening experience and was one of my first real failures in the kitchen and I don't believe I had recovered from it...

So with MUCH trepidation I began researching online. My favorite breads are rich, and dense, moist and flavorful with just a touch of sweet. I looked outside and saw the leaves on the trees beginning to turn and a bit of a chill on the breeze and decided that pumpkin should definitely be involved. The only problem: google "pumpkin bread recipe" and you will find 1,370,000 hits for different variations of sweet dessert-style pumpkin breads. This created a slight problem as I had no clue what ratios of pumpkin vs. flour i would need. So I began hunting down savory breads with other moist ingredients like sour cream, cottage cheese, applesauce, ect... After much research, and more than 
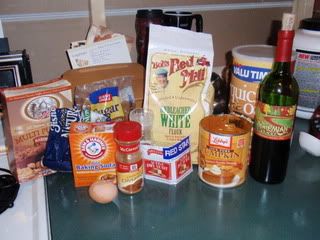
a little nervousness I wrote my basic recipe, assembled my ingredients and got started:
Photobucket
My first step was to put yeast in "warm-not-hot water". This proposed a bit of a challenge as my city's water tastes AWFUL so I used water from my brita pitcher which is cold, so I nuked it but I overnuked it (remember, "warm-not-hot"!) so I had to add more cold water, then pour off the extra, then I thought it was too cold so I stuck it back in the microwave for 5 seconds... I began to get nervous, this was already turning into an ordeal! I finally got the water to what I approximated to be "warm-not-hot" and dumped my packet of yeast in, stirred it up with a fork and then stared at it...
Photobucket
it didn't seem to be doing anything so I gave it another stir and stared some more... realistically only about 45 seconds passed but it seemed an eternity of nothing happened and my nervousness began to escalate to pre-panic mode... Finally I do what any sane girl does when she's freaking out about a recipe: (cue trumpets) I called Melissa! who didn't answer (booooo!) Next step is call my favoritest aunt who lives in Alabama and is a PHENOMENAL cook. She answers on the first ring (see Melissa, SHE was prepared for my panic!) I explain my ordeal and she says well you used "warm-not-hot" water right? (I love how this phrase is said as if its one word...) I said yes (very confidently of course, no need to let on to my "warm-not-hot" issues) then she says well all you need is the yeast the "warm-not-hot" water and sugar... Wait wait wait, why do I need sugar? she then explains that I need to "feed the yeast" or the bread won't rise... what's up with that?? this is a very high maintenance ingredient... I add a teaspoon of brown sugar, stir it up a little and stare at it... Aunt Diane nicely explains that it takes a few minutes and to just leave it be and move on to the next part of my bread... I think she just didn't want to listen to me breathe in her ear while I waited for the yeast to jump up and sing showtunes like that frog on that old cartoon (remember? "hello my baby hello my darling..." yes? no?) so I move on to the oat-nut flour.

In my handy little black & decker power chopper I throw in 1/2 cup of walnut halves and 1/2 cup of quick oats and pulse until its ground up fine... I make it 2 pulses before rushing back to check on the yeast, and GUESS WHAT!!! it DID something!!! nothing so cool as singing showtunes (how great would that be?? better than grilled cheese Mary!!) but it had developed a thin layer of foamy stuff that took it from the 1/4 cup mark to the 1/3 cup mark!!! Look!!
Photobucket
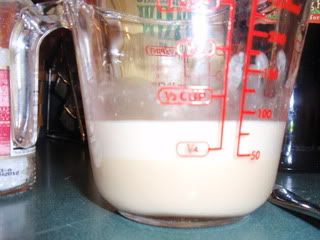
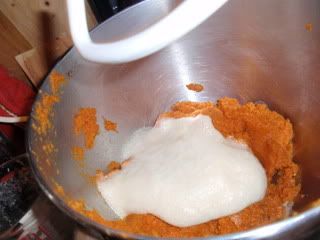
After confirming with my aunt that that's what its supposed to be doing I let her go and commenced with the breadmaking. Out comes my fabulously beautiful Kitchenaid Stand Mixer (any day that I get to use my Kitchenaid is a good day in my book, I inherited it from my Grandma who aside from being a really cool lady was an amazing cook, I spent many a summer watching and learning from her!). I finished pulsing the oats & walnuts to a fine powder I set aside about 3 tbs of the powder and dumped the rest in the bowl along with 2 cups of pumpkin from a can (mark this date my friends this is one of the few times you will ever see me use something from a can!!) my yeast-water mixture (which by this point has foamed up so much I'm worried it might start spilling over the sides of the cup!) 1/3 cup brown sugar, 1/4 tsp of baking soda, 1 tbs cinnamon, 1 tsp salt, and 1/2 cup of Hodgson Mills Gluten Free baking mix (it has good stuff like flax in it) and I start the mixer.
Photobucket
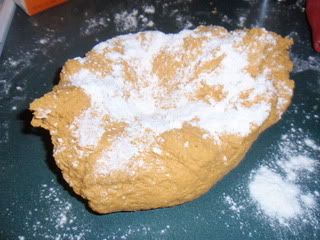
Once everything was mixed together nicely I began adding flour. Now I was told a few very important things about the flour one: there IS a difference between regular white flour and bread flour. I looked around and found Bob's Red Mill Unbromated (whatever that means) Unbleached White Flour and I will tell you I bought it mostly because it specifically said "Superb for breadmaking by hand or machine" now if Bob says something is superb, I trust him, he's never steered me wrong before (side note: have you SEEN how many different varieties of flour he makes??? I saw green pea, hazelnut and coconut!!) The other important thing I was told (by my aunt) was that you should make sure at least half of your dry ingredients are normal flour so that you'll have a "finer crumb"... I have no idea what that means but I made sure that I countered the cup of oat-nut mixture and the 1/2 cup of Hodgson Mills with at least that much white flour. Anyway so I started adding the flour a half cup at a time into the mixer until the dough started to hold together in a ball (I had added 2 1/2 cups) I sprinkled a light layer of flour on my counter and slapped my dough ball on the counter and began kneaing it, adding a little bit more flour any time it seemed too sticky (all together there was about 3 cups of flour in my bread) I kneaded it for about 8 minutes, until all the flour was incorporated into the dough and it wasn't overly sticky.
Photobucket
Now for the scary part: I spread a little butter into a big bowl, stuck the dough in the bowl and lightly covered it with plastic wrap. And then I stared at it... Photobucket
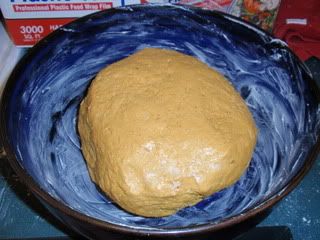
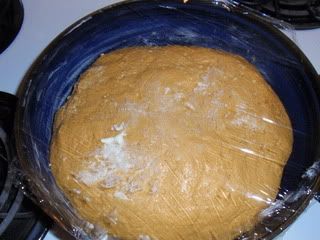
After a few minutes of nothing happening I finally left it be and cleaned up the kitchen then went to read for the hour it was supposed to rise. After my hour was up I rushed back to the kitchen and IT ROSE!!!!! I cannot tell you how excited I was, I actually had to go back through my camera to check and make sure it really was bigger! So a bunch of the recipes I looked at said to punch it down, re-cover and let it rise again for "a finer crumb" agian, I have no clue what that is but I'll go with it. I punched it down (breadmaking is therapeutic, I mean when you kneed it you really put your strength in there and then you get to beat it and on top of that you get a lovely sense of accomplishment when you see its doubled in size!) I covered it up again and pored myself a celebratory glass of wine and went back to my book (book 3 in the Twilight series if you're wondering...) and after 40 minutes i peeked again and will wonders never cease? it rose AGAIN!
Photobucket
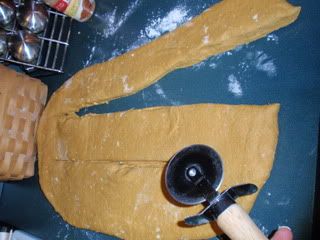
I pulled the dough out (after very lightly dusting my counter again) and rolled it into a rectangle roughly 9x12 and then using my pizza cutter I sliced it into three strips, leaving the tops attached.
Photobucket
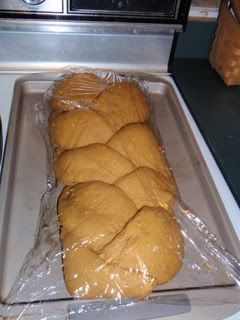
I then braided the strips (this part is a bit of a pain) and tucked the ends under the dough and transported it to my buttered cookie sheet, covered it again and went back to the vamps. Photobucket
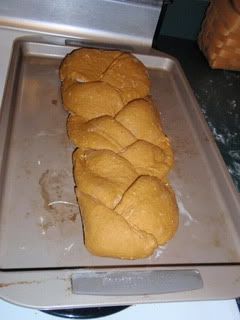
after another 40 minutes I came back and yet AGAIN it had nearly doubled in size! (I wonder if that works on other things? beat on it, ignore it and it doubles in size? your thoughts?)
Photobucket
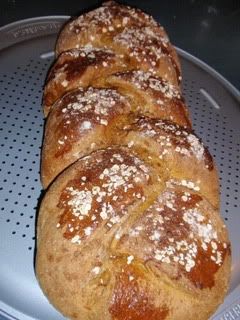
I pre-heated my oven to 375, cracked an egg in a bowl and whipped it with a fork and spread a light layer on the bread (I had to use a spatula, my nifty basting brush has gone missing... I suspect the dogs...) then sprinkled the oat-nut powder, a little bit of brown sugar, a little bit of cinnamon and some more non-ground up oats on top and stuck it in the oven for about 35 minutes.

I pulled it out and tapped and was rewarded with a lovely hollow sound, signaling proper done-ness, let it cool and sliced a piece off to share with hubby (cue angels singing) it tasted great! not overwhelmingly pumpkiny but rich and dense, a bread that won't get lost in a sandwich. Hubby rated it an A plus :)
Photobucket


So Nikki's official recipe for Savory Oat-Nut Pumpkin Bread:

1 packet active dry yeast
1/4 cup warm-not-hot water
1 tsp plus 1/4 cup brown sugar
1/2 cup walnut halves
1/2 cup oatmeal
1/2 cup Hodgeson Mills Baking Mix (really not necessary but I had it in the cupboard, sub another 1/2 cup flour if you don't use this)
2 cups canned pumpkin
1 tbs cinnamon
1 tsp salt
1/4 tsp baking powder
1 egg
1 greased/buttered bowl
1 greased/buttered baking sheet
plastic wrap
mix yeast and 1 tsp brown sugar into warm-not-hot-water, set aside for 5 minutes
put oats and walnuts into food processor and pulse into a fine powder, reserve 3 tbs for topping
Check to ensure yeast is foaming up (ie: alive) if so pour into a large mixing bowl, add oat-nut flour, baking mix (if you're using it), pumpkin, cinnamon, salt and baking powder. Blend until mixed. Add flour, 1/2 cup at a time until dough forms a ball.
Place dough on a floured surface and kneed for 8-10 minutes adding flour in small increments until its no longer really sticky. Form into a ball and place in greased bowl, loosely cover with plastic wrap and set in a warm place (I pre-heated my oven to 200 then turned it off and kept the bowl near the burner that the oven vents out of) leave for 1 hour. recommend cleaning up the mess you made of the kitchen during this hour... but if you're not as messy as me (I'm really messy) you can find other more... constructive... things to do with the time...
After the hour is up return to the bowl and you will see it has doubled in size! (woo hoo!!!) punch the dough down a few times and re-form the ball, cover again and leave it for about 45 minutes (until it doubles again)
** This next part is optional, if you don't want a braid just stick the dough in a greased loaf pan (its a lot of dough you might need two loaf pans...) and skip on to the cover/let rise part**
Take dough out and put it on a lightly floured surface, roll it out to a 12x9 rectangle, cut into 3 strips, leaving the tops attached and braid. Fold the ends under and carefully transfer to a greased cookie sheet. Cover loosely with plastic wrap and let it rise for 45 minutes.
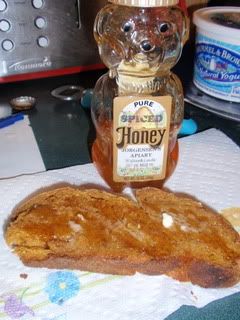
Preheat oven to 375. Lightly beat egg and spread on top of bread dough sprinkle oat-nut flour, more oats, a little brown sugar, and cinnamon (use your taste/judgement, if you want a lot sprinkle a lot!) and bake for 35-40 minutes (until bread sounds hollow when you tap it) place on wire rack and allow to cool, slice it up and serve it however you wish, I toasted it and topped it with butter & honey:
Photobucket